
Having multiple build configs can clutter up the TeamCity dashboard and make maintenance bothersome. The use of inheritance and build templates can help with maintenance, but that doesn’t solve the issue of having a build config for each environment (DEV, TEST, PROD, etc).
Using TeamCity service messages and the TeamCity REST API can help solve this problem and keep all operations for a project under one build config. In some cases this can help reduce costs since the number of build configs TeamCity allows is limited by the Licensing that was obtained.
The example used in this article is to support deployment to multiple environments however this may be used for builds, testing and so on.
By following this article, the TeamCity dashboard would go from looking like this (with a “Execute Deployment” build config under each project):
Before
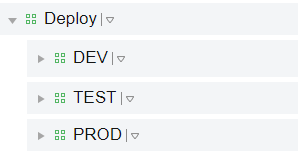
To this:
After

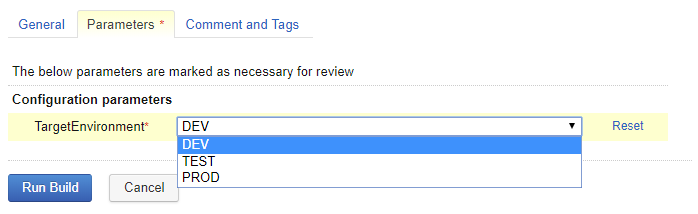
Selecting an environment will now occur when clicking “Run” on the new build config; the user will be prompted to select an environment.
Procedure
- For this to work correctly all values that need to change per environment must be parameterized. You should also consider making a TeamCity service account that will be used for REST API calls.
- Devise a parameter naming convention to denote the environment that the parameter value belongs to. Avoid using prefixes that interfere with TeamCity’s defaults (env., system., dep.)
- Ex:
TargetServerAddress becomes defined as:
DEV.TargetServerAddres
TEST.TargetServerAddress
PROD.TargetServerAddress
- Ex:
- Go through all the parameters and update them to follow the formatting specified above.
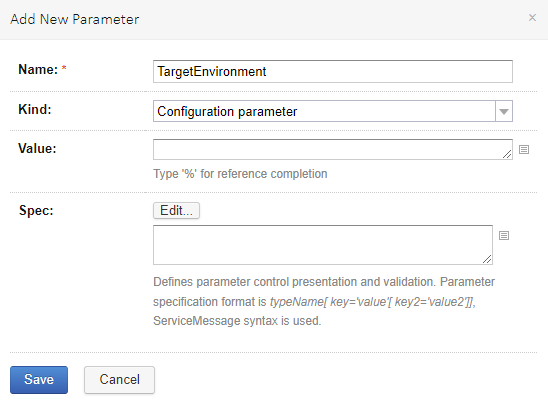
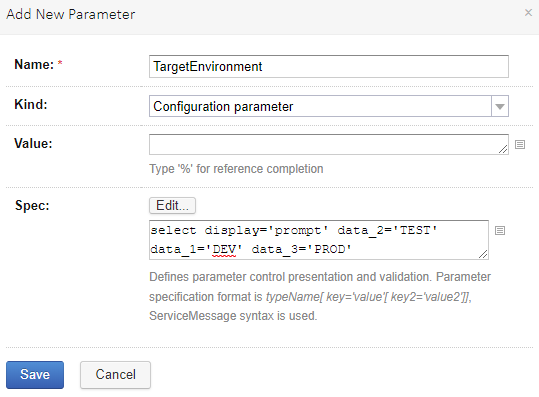
- On the TeamCity project that will have the environment switches, add a parameter “TargetEnvironment” which will prompt the user for a selection upon running a build.
- Select “Edit…” in the Spec section to modify the parameter to prompt the user
- Fill in the various environment identifiers (these are defined in step 2)
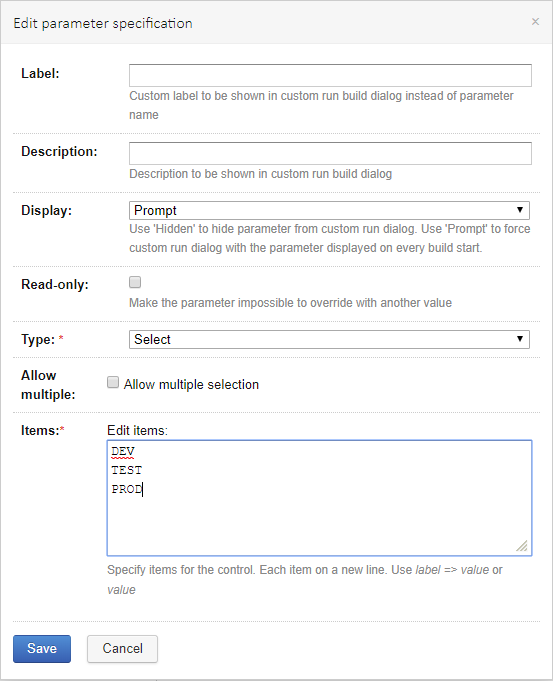
- The final result should look like this
- Select “Edit…” in the Spec section to modify the parameter to prompt the user
- Create a build config to execute a shell script. The following examples are done using the PowerShell build runner.
- Create your auth headers.[ps]$pair = "$($TeamCityApiUserName):$($TeamCityApiPassword)"
$encodedCreds = [System.Convert]::ToBase64String([System.Text.Encoding]::ASCII.GetBytes($pair))
$basicAuthValue = "Basic $encodedCreds"
$tcHeaders = @{
"Authorization" = $basicAuthValue;
"Accept" = "application/xml";
"Content-Type" = "application/xml";
}[/ps] - Create helper function to get all TeamCity parameters for a specified Project Id.[ps]
Function GetTeamCityParameters($ProjectId) {
try {
$api = "$($TeamCityHost)httpAuth/app/rest/projects/id:$ProjectId/parameters"
$response = Invoke-WebRequest -Uri $api -Headers $tcHeaders -Method GET
$api
return ([xml] $response).properties.property
} catch {
throw
}
}
[/ps] - Create helper function to Emit TeamCityParameters using TeamCity Service Messages[ps]Function EmitTeamCityParameter($Key, $Value) {
Write-Host "##teamcity[setParameter name=’$Key’ value=’$Value’]"
}[/ps] - Loop through all matching parameters to emit the value of “DEV.TargetServerAddress” as the value for “TargetServerAddress”.[ps]ForEach ($param in (GetTeamCityParameters $ProjectId)) {
if ($param.Name -and $param.Name.StartsWith("$TargetEnvironment.")) {
EmitTeamCityParameter -Key ($param.Name).Replace("$TargetEnvironment.","") -Value "%%$($param.Name)%%"
}
}[/ps]
- Create your auth headers.[ps]$pair = "$($TeamCityApiUserName):$($TeamCityApiPassword)"
- To make use of these freshly emitted environment parameters whichever build config being set up for multi-environment use, in my case Execute Deployment, must have a Snapshot Dependency on the build config that emits the environment parameters.
- Every time an emitted parameter is to be used it must be called on via dependency parameter. For instance, to use the emitted value “TargetServerAddress” in a build config it must be called like so:
%dep.EmitEnvironmentParameters.TargetServerAddress% - This is because using TeamCity Service Messages will only update the value of the parameter for the single build that executed. What this means is after Emit Environment Parameter executes, the value of “TargetServerAddress” never gets persisted.
- Every time an emitted parameter is to be used it must be called on via dependency parameter. For instance, to use the emitted value “TargetServerAddress” in a build config it must be called like so:
You may run into problems when attempting this password parameters. This is because TeamCity masks all passwords as asterisks before executing the script, effectively resulting in the parameter value being updated as ******* rather than whatever the passwords true value is. In the next blog post, we will discuss using the TeamCity REST API to get around this issue with passwords.